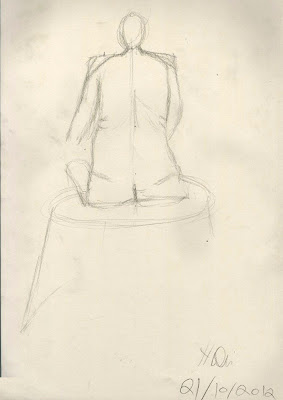
this week was all about anatomy so that means we were doing drawings of life model. this was my first time doing such type of drawing and looking at my work I have a long way to go.
stage 1- quick sketches (1 min each)
Here we have some quick sketches of the model. we can see that there is some planing such as place lines on page which outline where the shoulder and the angle of the shoulder as well. also mapping out where arms go as well as the spine. this is to help when drawing the model as know where to draw.
stage 2
this drawing took 5 minutes here you can see more planning such as where the body parts such as legs, arms etc will be placed as well as the angle of the hips and waist. one problem you can see is from the leg on the right side of the page there is far to much negative space between the legs, the torso doesn't look very realistic as the right side of the torso is to straight there isn't any curves at all.
stage 3
in this image so can see the use of measurements by using the pencil to mark out the length of the model and to mark out the waist and length of the arms. here the drawing is much better the curves are much better and the proportion of the model has improved. however the head does seem a bit to small and the arms aren't very well detail and doesn't show any muscle and look to straight.
here is the final image of the model, we can clearly see how this image has used the techniques from previous sketches. the proportions on the body are right and the head looks right size. there is some detail around the body such as curves and folds in body. however there isn't much shading on the body and left leg looks out of place.
direct study
direct study image 1- front view
we get good sense of the pose in this image, we can see that the model is angled away from us. there is a bit of foreshorten on the left shoulder as it is angled away from the viewer. the breasts aren't well drawn as there far to many hairy lines around them that they don't look natural. the hand isn't well drawn and doesn't look natural. the neck if far to big.
direct study image 2- back view
their some good use of detail in this image such as the shading on the hair, as certain areas are more darker than others due to the light, the folds on the skin are clear as well and we can even seen the line of the spine. their is some good shading being used here as you can see around the shoulder areas their is a much darker value due to the model being angled away from the light.
direct study image 3- side view
good sense of pose in this image, we can see a little foreshortening on the back of the leg and on the shoulders as we have just see where the other leg and arm is. the breasts are a bit smaller compared to the model and as you can see their have been attempts to correct this in the drawing. their isn't as much shading on this model compared to previous drawings, the shading is mostly event on the right side of the body and the hair. to improve this drawing its should include more shading around rest of the body to make the image. the arm is far to straight and doesn't show much muscle.


No comments:
Post a Comment